Building a Template Chooser
This article covers the fundamentals of how to build a template chooser using Duda’s API, enabling your users to choose a template in a DIY(Do-it-Yourself) flow. The chosen template can be previewed or a site can be generated with it.
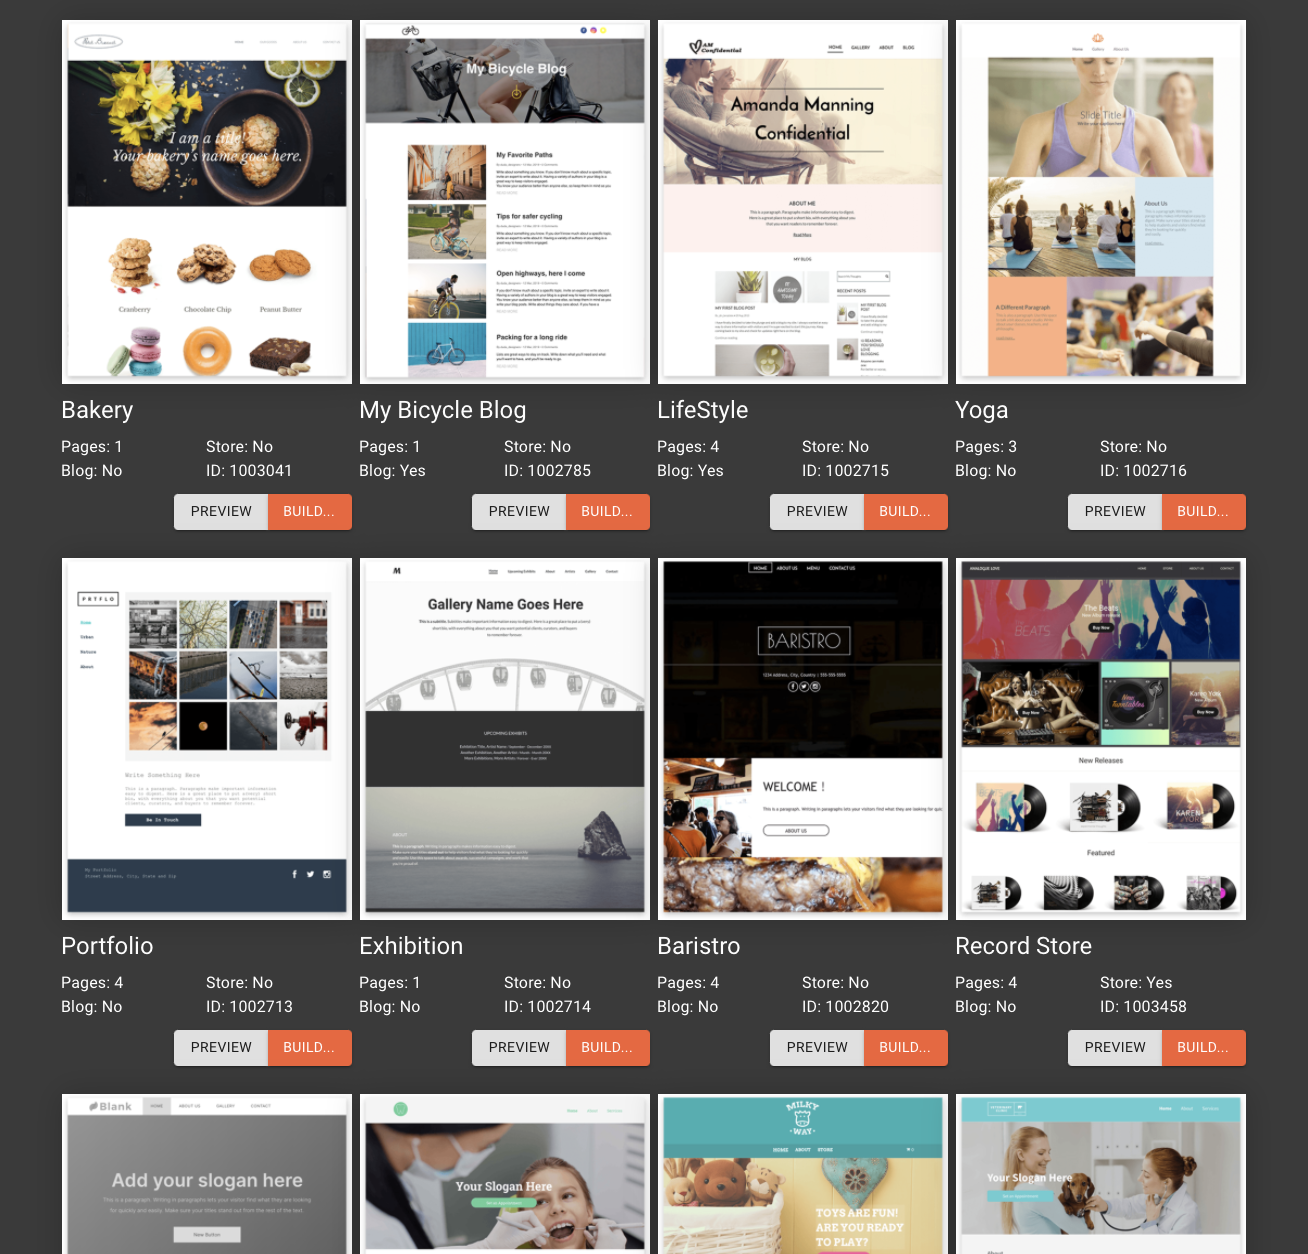
The following is an example of a template chooser interface:

You can see a preview image of each template, the name of the template, some details about it, and, most importantly, two calls to action. Preview takes you to the preview page to see desktop/tablet/mobile views. Build allows you to build a site with the chosen template.
All of this information is available via Duda’s API and can easily be accessed and used to build a list style interface. This article covers the fundamentals of using the API to retrieve the templates and build a list view using JavaScript, React, and Material UI.
You can access the full code from this tutorial on Github:
https://github.com/DudaDev/duda-instant-site-demo
Step 1 - List Templates
The first step is to get all available templates in your account. To do this, we will use the List Templates API call to get all metadata for each template.
The request is simple:
curl --request GET \
  --url https://api.duda.co/api/sites/multiscreen/templates \
  --header 'Content-Type: application/json' \
  --header 'Authorization: Basic ABCabc1234567890='
const { Duda } = require('@dudadev/partner-api');
const duda = new Duda({
user: 'username',
pass: 'password'
});
duda.templates.list(function(err, templates) {
if (err) // handle error
console.log(templates);
});The response contains all of the templates. Here’s a snippet:
[
    {
        "template_name": "Conference",
        "preview_url": "http://dashboard.russjeffery.com/preview/dm-theme-1004580-en-320",
        "thumbnail_url": "https://irp-cdn.multiscreensite.com/c3e028f9d55f47dfbde4c4c237ffda9f/siteTemplateIcons/LgJaTshSpaGY709UMa5f_BigPreview%20(2).jpg",
        "desktop_thumbnail_url": "https://irp-cdn.multiscreensite.com/c3e028f9d55f47dfbde4c4c237ffda9f/siteTemplateIcons/10xwaGtIQX6GQziGsTXs_conference_desktop.png",
        "tablet_thumbnail_url": "https://irp-cdn.multiscreensite.com/c3e028f9d55f47dfbde4c4c237ffda9f/siteTemplateIcons/RezGoJXWQWWbOkd73RBI_conference_tablet.png",
        "mobile_thumbnail_url": "https://irp-cdn.multiscreensite.com/c3e028f9d55f47dfbde4c4c237ffda9f/siteTemplateIcons/r4gs9oeLQz8JItdoilAL_conference_mobile.png",
        "template_id": 1004580,
        "template_properties": {
            "can_build_from_url": false,
            "has_store": false,
            "has_blog": false,
            "page_count": 3
        }
    }
]
All of Duda’s out-of-the-box templates, as well as your Team Templates, are returned by the API. You can prefix your template_names with something predictable allowing you to filter your parsed template list based on that.
You may handle this list of templates in a way that works best for you—caching, as necessary, only the templates you wish to show your users. In the rest of this guide, I will simply import the list directly from a JSON file rather than making the network request. To see an example where the template viewer requests a fresh template list each time the page loads, see the example code in our Github repository: https://github.com/DudaDev/duda-instant-site-demo/tree/main/frontend/src/Components/Flows/TemplateViewer
Step 2 - Displaying Templates
Now that we have a list of templates, let’s import the list into our React app. Use the following code:
function TemplateChooser() {
    return (
        <>
            { templates.map((template) => {
                return <Item template={template} key={template.template_id}/>
            }) }
        </>
    );
}

export default TemplateChooser
Now we have a TemplateChooser component that imports the template list and maps it into Item components. The Item component takes the template as a prop to populate the elements we need to render the template details:
import { Button, ButtonGroup, Container, Grid, Typography } from '@material-ui/core';
import Image from 'material-ui-image';

function TemplateItem(props) {

    const template = props.template;

    return (
        <>
            <Image src={template.desktop_thumbnail_url} alt={`Preview of ${template.template_name}`} aspectRatio={0.8} />
            <Typography variant='h5'>{template.template_name}</Typography>
            <Grid container>
                <Grid xs={6}>
                    <Typography>Pages: {template.template_properties.page_count}</Typography>
                    <Typography>Blog: {template.template_properties.has_blog ? "Yes" : "No"}</Typography>
                </Grid>
                <Grid xs={6}>
                    <Typography>Store: {template.template_properties.has_store ? "Yes" : "No"}</Typography>
                    <Typography>ID: {template.template_id}</Typography>
                </Grid>
                <Grid xs={12}>
                    <ButtonGroup>
                        <Button variant="contained" color="default" onClick={() => { window.open(template.preview_url) }}>Preview</Button>
                        <Button variant="contained" color="primary" onClick={buildSite}>Build...</Button>
                    </ButtonGroup>
                </Grid>
            </Grid>
        </>
    );

}

export default TemplateItem;
Handling preview button clicks is as simple as redirecting the user to the preview_url. For a look at how to implement a build button, see our full demo environment here.
Conclusion
You've now seen how to use the Duda API to retrieve the templates and build a list view using JavaScript, React, and Material UI. See the related article to see how to get started with our demo environment to see how to do a lot more.
Updated 8 months ago